Milky Baby‑Boomer Nails: Salon Acrylic Fade Method
A salon-ready, step-by-step acrylic method for a subtle pink-to-clear baby‑boomer using Bad Enough #213 and reliable blend control.
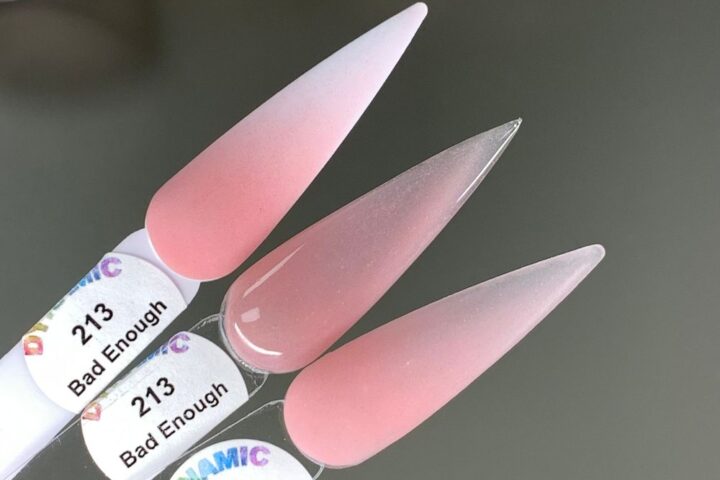
With spring bookings rising, we find clients asking for softer, more photographable manicures — milky baby‑boomer nails fit that seasonal brief perfectly. In this piece we walk through a repeatable, salon workflow using Bad Enough Nude Acrylic Powder #213 so students and beginners can offer a dependable pink‑to‑clear fade.
Service Setup
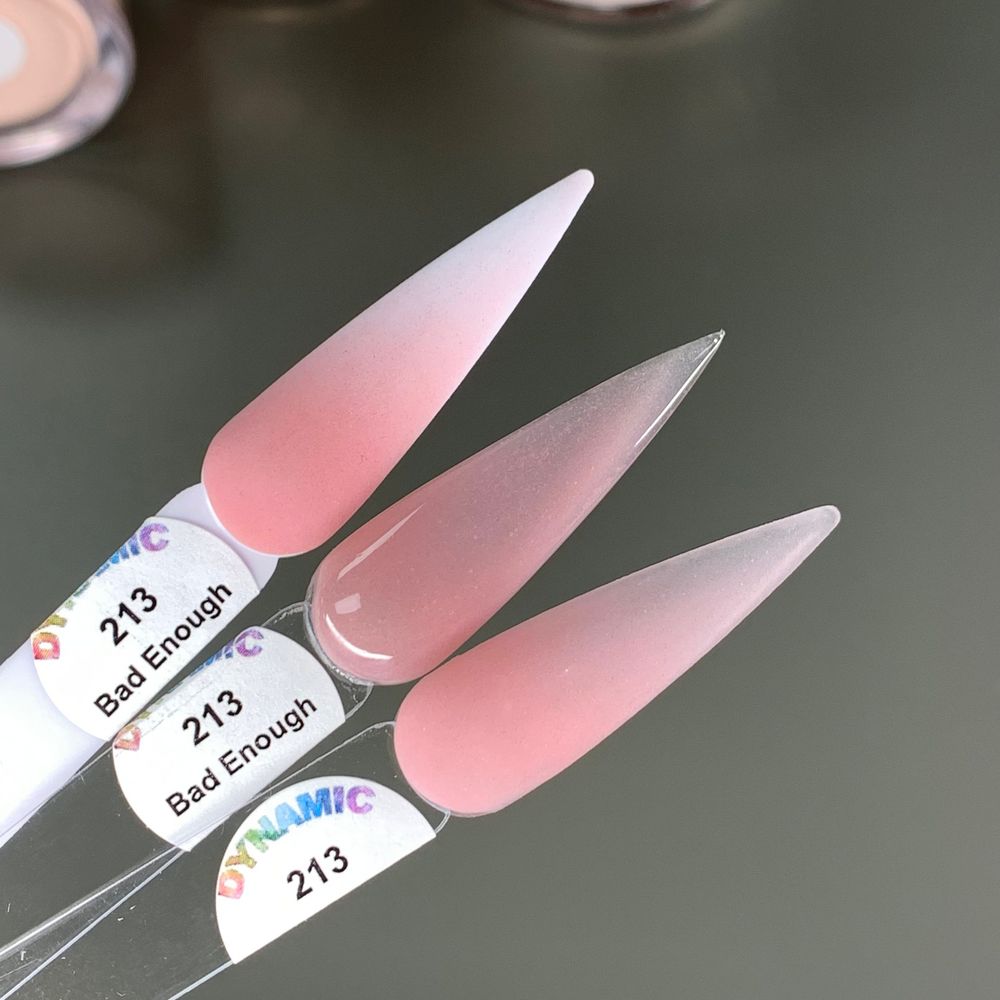
Bad Enough #213 palette of milky pinks
We approach this as a 45–60 minute add‑on service layered onto a basic acrylic refill or full set. Prepare a ventilated station, fresh files and a medium‑firm synthetic brush. For this technique use the two palest tones visible in the sample: pale translucent pink and milky sheer pink. Keep monomer in a shallow dappen dish and a separate cleanup liquid for the cuticle zone. Lay out short‑square and almond tip guides if you plan to demo both shapes; these shapes read most consistently with the subtle fade shown in the product image.
Prep And Base
We begin with standard sanitation and natural nail prep: remove old product, push back cuticles, and dehydrate the nail plate. Shape the natural free edge to match the intended short‑square or almond silhouette. Apply a thin primer or bonder per manufacturer guidance, avoiding contact with skin. For structure, we recommend a light clear apex bead placed 1–2 mm from the cuticle line — this establishes strength while preserving translucency in the final fade.
Bead Strategy
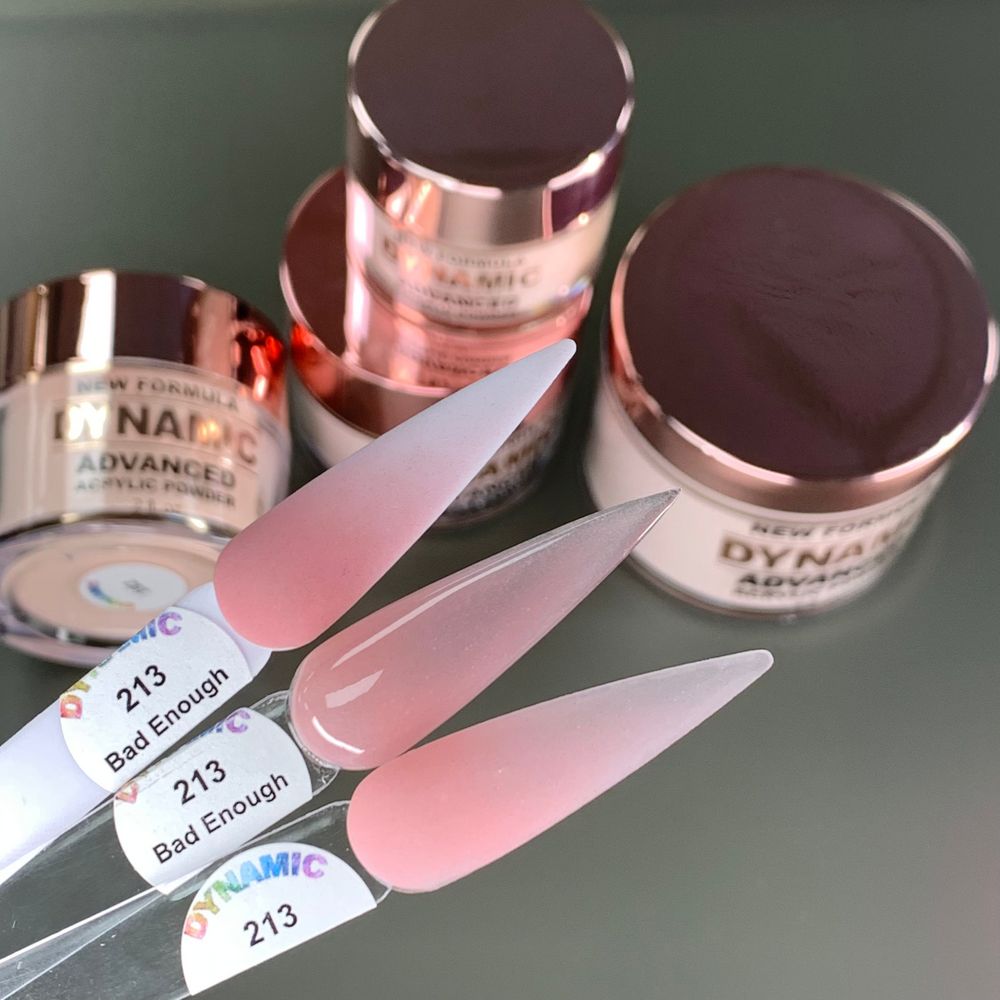
Glossy finish with fine micro-sheen
The technique depends on disciplined bead sizing. We use three beads per nail: a small clear or very pale base near the cuticle, a mid‑size bead of milky sheer pink across the mid‑nail, and a final small bead of pale translucent pink toward the free edge. Pick up Bad Enough Nude Acrylic Powder #213 with a damp brush to form each bead; the semi‑sheer formula blends without muddying when handled promptly.
Blend Workflow
On the second bead, sweep the brush gently from the mid‑nail toward the free edge to create a graded overlap. Work quickly but deliberately: over‑working can flatten the micro‑sheen visible in the demo tips. For a reversible, salon‑friendly method we recommend curing each bead by letting it set naturally until slightly tack‑free rather than forcing thin strokes. If you need a subtler fade, reduce the pigment in the second bead by dusting powder off the brush before placement.
For students building a bridal menu we recommend practicing the pink‑to‑clear fade with Bad Enough Nude Powder to learn how the semi‑sheer layers interact.
Tip Technique
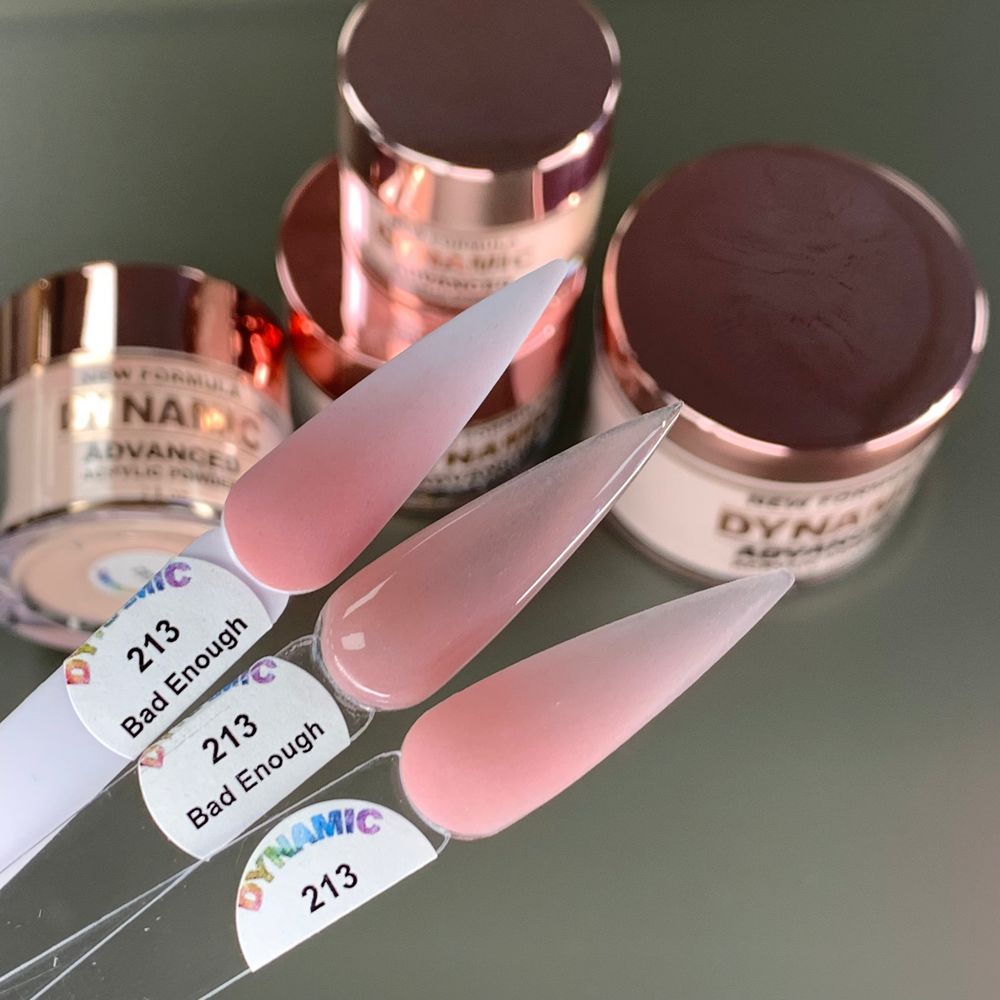
Subtle pink-to-clear baby-boomer fade
For a classic baby‑boomer fade keep the free edge nearly clear, using the pale translucent pink as the final thin bead. For short‑square nails maintain a 1.5–2 mm visible clear tip; for almond shapes you can allow the translucent zone to extend slightly for optical length. Use light, ascending pressure with the brush when smoothing toward the tip to keep the glossy micro‑sheen consistent across the fade.
We place the product tray, spatula and swatches where clients can see the labeled sample tabs — this helps confirm shade 213 during consultation and avoids expectation gaps.
Finishing
After the acrylic sets, file to the final shape using a 180/240 progression. Buff gently to preserve that fine micro‑sheen; aggressive buffing will remove the semi‑sheer depth the polish provides. For high gloss, finish with a shine top coat; if you want a bridal‑soft look use a thin layer so the translucency remains visible. Seal the free edge to reduce lifting and advise clients on gentle wear habits for the first 24–48 hours.
Pricing And Upsells
Position this as a value add: charge a small upgrade over a standard refill for the extra layering and blending time. Offer complementary upsells: a clear strengthening overlay, light gel top coat for extra longevity, and a short home‑care pack (cuticle oil plus a brief aftercare card). Note that jar sizes shown for this powder range from 1 oz to 4 oz, and prices may change.
Common Adjustments
- If the fade appears harsh, feather the junction with a barely‑wet brush and re‑blend a thin bead across the line.
- For clients with warm skin tones emphasize the milky sheer pink layer to avoid overly cool results.
- If the final set looks cloudy, check monomer ratio and bead hydration; semi‑sheer finishes are sensitive to liquid balance.
Safety Notes
Use standard acrylic safety: work in a ventilated area, use skin‑safe primer and avoid product contact with skin. Keep jars closed when not in use and label swatches clearly. Dispose of mixed monomer responsibly and keep client records for allergy questions.
Short FAQ
- Can beginners learn this? Yes — disciplined bead control and timed practice make the fade repeatable.
- Which shape lasts best? Short‑square for durability; almond for visual length at a slight wear trade‑off.
- Does the finish photograph well? The fine micro‑sheen shown on the demo tips is camera‑friendly when preserved with a light top coat.
Mini FAQ
- How long does it take? 45–60 minutes when added to a refill or full set.
- Which jar size should a student buy? Start with a 1 oz for practice; scale up for salon volume.
- Can we use the same method for gel? The workflow is similar, but material handling and cure methods differ.