Everything To Know: Ruby Red Mixed Rhinestone Ideas
Five salon- and home-friendly accent looks using the Mixed Shape ruby red box, with placement diagrams and service notes.
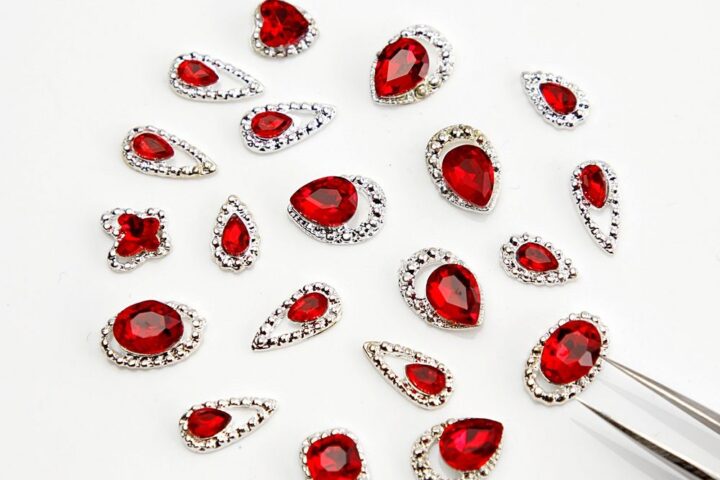
With holiday bookings and Valentine’s looks on the rise, we open this season by focusing on a signature accent: the Mixed Shape ruby-red option. In this guide we map five add-on services that use the 20pcs Luxury Mixed Shape Silver Ruby Red Nail Rhinestone Charm Set Box so you can offer honest, sellable upgrades for clients seeking vampy or romantic statements.
Service Concept
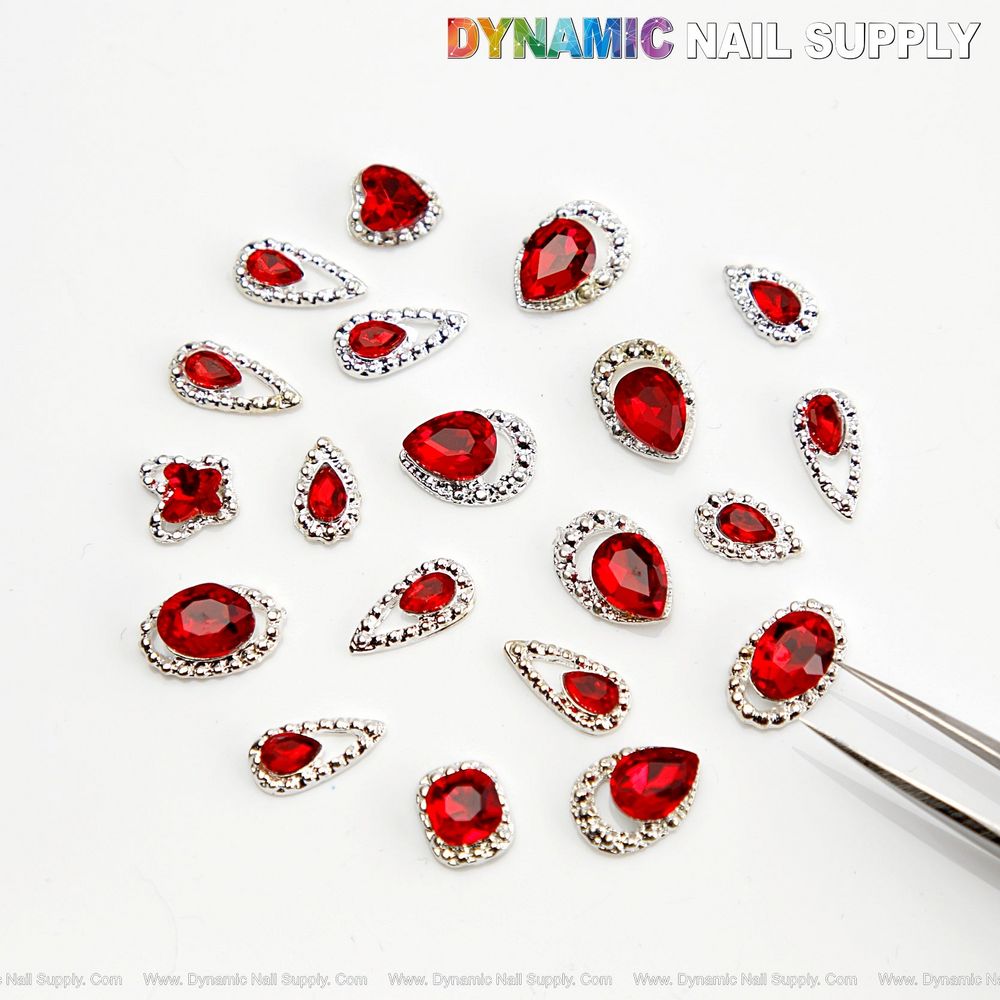
Ruby-red mixed shapes with clear halo and tweezers for scale
We position this set as a compact upsell: twenty mixed-shape ruby-red gems in silver settings give a jewelry-like focal point without excessive bulk. The Mixed Shape identity is key — teardrops, ovals and novelty mini-hearts let us vary scale across nail types while keeping a cohesive red-and-silver palette. The set retails at $5.99; prices may change, and we recommend bundling it into a fixed add-on price to simplify front-desk offers. For an online reference use ruby red mixed-shape box in booking notes or service descriptions.
Look One: Full-Cover Vamp
Concept: a single full-cover accent nail set with the largest ruby-red oval centered on a high-gloss deep-red base. The outcome reads bold and classic.
Placement Diagram
- Prep natural or enhancement nail; apply two coats matching base red.
- Locate the largest oval; place at the nail center along the longitudinal axis.
- Surround with two to three small clear halos from the set if space allows.
Service Notes
- Time: add 8–12 minutes to a full set for placement and cure.
- Product hold: use a gel builder or strong resin adhesive and seal with a generous topcoat around the metal setting.
Look Two: Matte Heart Cluster
Concept: a romantic contrast using matte black polish as the negative space for ruby red heart shapes. This is salon-friendly and beginner-accessible for at-home clients.
Placement Diagram
- Use matte black on the accent nail; select one small heart and one teardrop.
- Place the heart slightly off-center toward the cuticle and the teardrop tip toward the free edge to form a loose cluster.
- Fix with a thin layer of glossy topcoat only over the gems to preserve surrounding matte texture.
Service Notes
- Recommend as a single-nail upgrade for clients booking a full-matte mani.
- Time: quick add, 6–10 minutes; ideal as a retailable add-on.
Look Three: Bridal French Accent
Concept: a small ruby-red gem centered on a silver-glitter French tip for brides who want a red accent without overpowering the nail. This marries classic white with jewelry-like sparkle.
Placement Diagram
- Create a delicate silver-glitter smile line across the free edge.
- Place a tiny round or oval ruby-red stone at the lateral midpoint of the tip or the center, depending on nail width.
- Seal with a light topcoat to protect the metal setting and glitter band.
Service Notes
- Sell as a bridal package add-on; one to four stones per hand keeps the look refined.
- Time: 6–15 minutes depending on count; advise clients that stones are focal points for photos.
Look Four: Holiday Statement
Concept: cluster placement across two adjacent nails for high-impact festive designs. Use bright silver accents from the set to enhance the jewelry effect.
Placement Diagram
- Choose two adjacent nails (ring and middle or index and middle).
- Form a triangular cluster of one large teardrop plus two smaller stones at the cuticle area.
- Balance with a light dusting of silver microglitter on the surrounding nails.
Service Notes
- Upsell as a seasonal package; recommend removal and replacement for long-wear holidays.
- Time: 12–20 minutes for both clusters; advise clients on aftercare to avoid snagging.
Look Five: Gothic-Glam Ombré
Concept: a deep red-to-black ombré with a small ruby cluster near the free edge for a dramatic, moody finish favored by alternative and evening clients.
Placement Diagram
- Create a smooth ombré from black at the cuticle to deep red at the free edge.
- Place a trio of mixed small shapes in a staggered line just above the free edge.
- Finish with a high-shine topcoat to amplify the faceted centers.
Service Notes
- Best as a premium add-on for clients booking ombré or specialty color services.
- Time: 10–18 minutes; placement requires steady tweezers and a curing stage for gel adhesive.
Tools, Pricing, Safety
Tools we recommend for reliable placement: fine-point tweezers, a pick-up wax or sticky gel, and a high-hold adhesive or builder gel for long-term wear. Handle tiny metal settings with care to avoid bending; store loose charms in their box to keep halos intact. Avoid applying gems directly to damaged natural nails — use enhancements or recommend a prep service. We mention the set price once for reference; consider a clear add-on fee so customers know exactly what they pay.
Short FAQ
Q1: How long do these accents last? A1: Longevity depends on adhesive choice and client activities; secure with proper adhesive and topcoat.
Q2: Can beginners place them at home? A2: Yes — select one or two stones per hand for an easy start and follow curing steps for adhesives.
Q3: Which nail shapes suit the Mixed Shape set best? A3: The variety in the Mixed Shape box adapts well to short squares and longer ovals; choose stone scale to match the canvas.
Mini FAQ — three quick checks:
- Will this set read jewelry-like on camera? Yes, the faceted centers and silver frames photograph well.
- Do we recommend full-hand coverage? No — the set is optimized for accents and clusters, not full-hand gem coverage.
- Is special storage required? Keep pieces separated and dry to preserve the tiny clear halos.